I keep running low on disk space. But Windows 10 has a new feature to help out called “Storage Sense”. How do I get that running?
Like every modern operating system, Windows 10 has a way of slowly filling up all the available space on your hard disk. Log files record what you’ve done, upgrades leave install files around, programs create and then fail to delete temporary work files. You download files and forget to delete them or find you don’t need them at all. And so it goes.
Fortunately, the Microsoft team must have the very same issues because one of the nicest features in Windows 10 is called “Storage Sense” and it can automatically delete old, unused files and trim those never-shrinking log files to help keep your system slim and healthy! If you turn it on, that is, because by default it’s disabled and doing you no darn good at all.
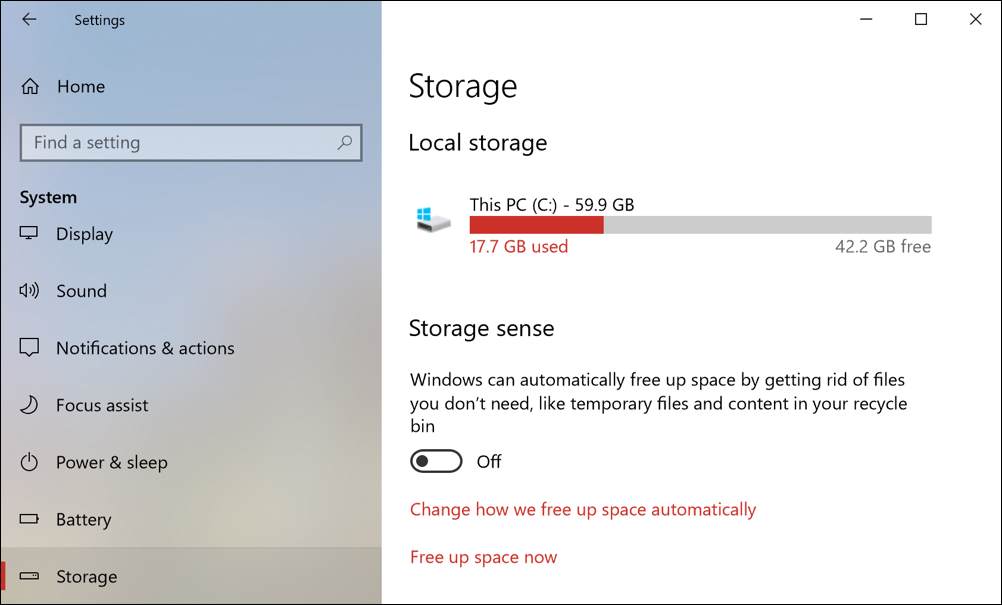
To jump right to the correct place, do a Cortana search for “storage” and choose “storage settings”. You’ll end up here:

You can see that I don’t have a ton of space on my Win10 PC – 60GB – but that it’s mostly free and that I’m only actually using a svelte 17.7GB of that space. Still, I don’t want things to automatically grow and expand without me realizing, so I’m going to enable storage sense.
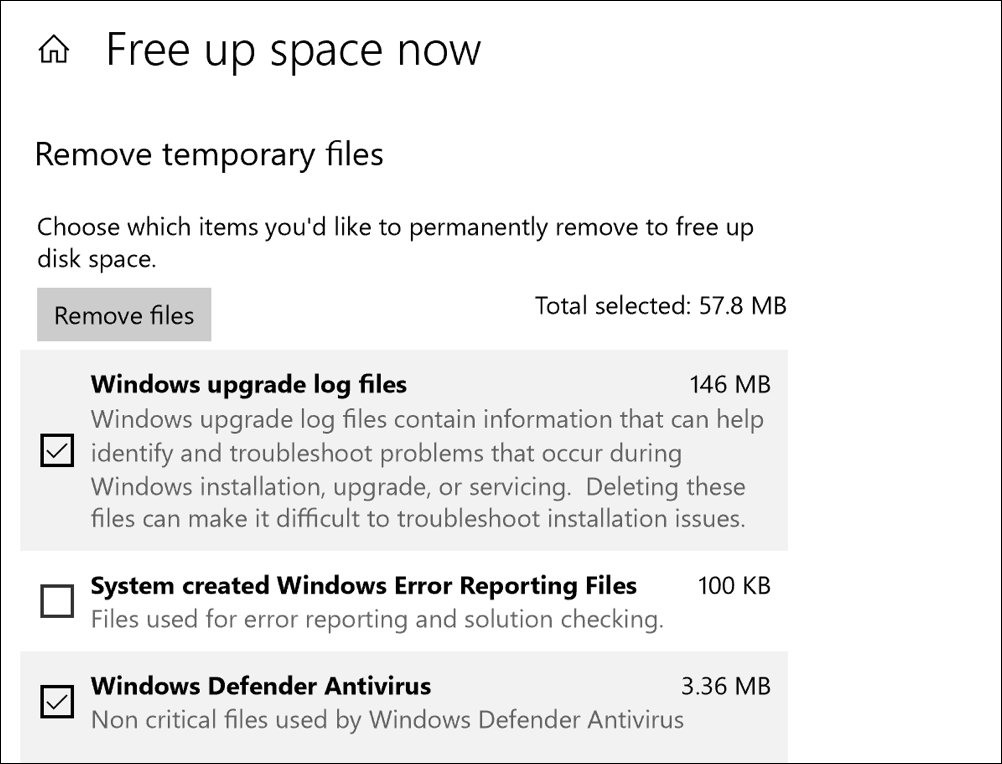
That’s done by clicking on the switch so that it says “On”, not “Off”, as shown above. Two more steps so you can get a sense of what’s going on. First, click on “Free up space now“.

Eagle-eyed readers will note that the math doesn’t work above: How can 3.36MB + 146MB = 57.8MB? We’ll just call this Microsoft math, okay? 🙂 Regardless, you can see what it’s found in various categories and how much space is being wasted by each type of file. For some systems, it’ll be similarly small but your system might have multiple gigabytes of these junk files laying around!
Click on “Remove files” and they’ll all vanish, freeing up more disk space for you!
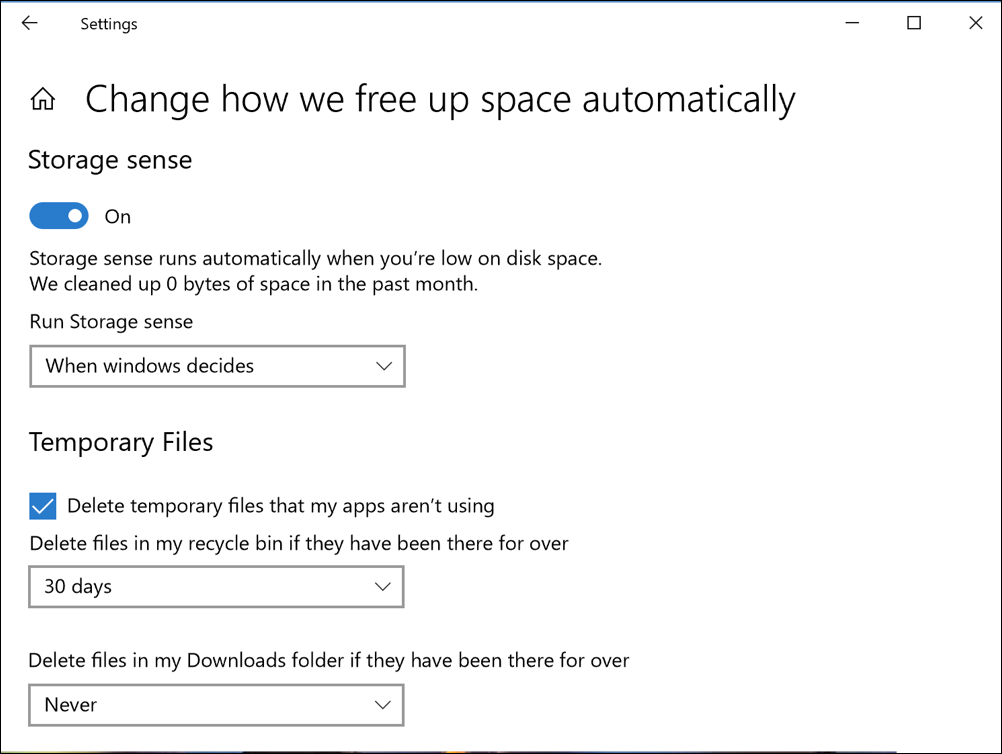
The other thing to do is to go back to the Storage window and click on “Change how we free up space automatically” so you can see what’s included and what is excluded. Here are the basic options:

I suggest that you can leave all the defaults, but read carefully through before you switch to something else and forget forever that Windows is now automatically deleting old, unused files for you! 🙂
And that’s it. You’re up and running with Storage Sense.
Sources: askdavetaylor
Hey My Readers and Visitirs If You Like Us or Our Web Site Please Share and Link back To My Site ... Take Care .,.,.


.png)
0 comments:
Post a Comment