


Being a Windows user for a long time, you must have faced the USB Device Not Recognized sometime in your life. Well, you are not alone as it is the most common problems encountered by many Windows users out there.
In the early days of computing, we highly relied on CDs or DVDs to transfer or sometimes even store data that’s portable. With time, however, the CDs and DVDs got replaced by USB flash drives or Pen Drives. This tiny USB stick or flash drive or pen drive, call it whatever, got an instant hit among the computer geeks as this device was quite useful in storing important data such as files or folders, movies, music, presentation slides etc.
People relied on these pen drives to carry their data wherever it’s required without the need to carry any heavy laptop or any other heavy equipment. All you need is a Windows PC with a working USB port and a simple plug and play will let you access the data from anywhere.
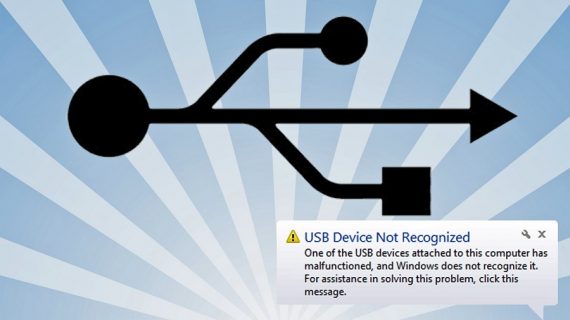
Although it seems a viable solution for data transfer, it also has its cons. The primary issue that most of us face while using the pen drive is the USB Device Not Recognized error. Every time you plug the pen drive into your desktop or laptop, you get a popup or notification stating, USB not recognized, which is quite frustrating and irritating as you need to access the data at that very moment.
Well, even though it is the most common and irritating problem, there are ways that you can try to get it resolved. Before we move on these different solutions, I must tell you that there’s no guarantee that the USB Device Not Recognized will be solved. These troubleshooting methods work most of the times. However, if the pen drive is corrupted, then there are chances that you may lose forever. Also, if the flash drive is under any virus attack, then you can always try and remove the malware to get it fixed.
Troubleshooting to Resolve USB Device Not Recognized Error
Patience is the key while facing errors such as USB not recognized as there’s no primary reason for the occurrence of this error. Most of the times, it’s just a technical glitch or compatibility issue and can be resolved with some quick basic troubleshooting, while sometimes you may have to try a few advanced methods.
So, if you are facing USB Device Not Recognized error on your Windows PC, whenever you plug in your Pen Drive, then follow these troubleshooting methods to resolve the issue.
Troubleshooting 1 – Shut Down And Unplug Your Computer
This is the simplest troubleshooting option whenever you pen drive is not detected on your Windows desktop or laptop. If this method works, then it can save a lot of time for you. Shut down your Windows PC and unplug the machine completely from the power supply. A mere restart is not enough. You need to shut down your PC and disconnect it from any power supply whatsoever.
Sometimes, even if you shut down or restart your PC, most modern computers don’t actually turn off. The motherboard can still get power until the power is completely taken out.
Remember, a motherboard is the heart of your PC and all the hardware including USB ports are connected to the machine via the motherboard. When the motherboard is rebooted, the small microprocessor on the motherboard will reload the drivers, including the drivers for USB devices, and it may start recognizing your pen drive when you plug it in.
Simply try and Shut Down your Windows PC, switch off the power and wait for 5-10 minutes. Then, switch on the power, and start your PC. Once the Windows is loaded completely, you can test your Pen Drive.
Troubleshooting 2 –Update the Driver
Another reason why your Windows PC is not able to recognize the USB device may be because of the missing or outdated drivers. Well, don’t worry about it. Simply go to the Device Manager panel on your Windows PC. If you are not aware of the term, then simply click “Start” and type devmgmt.msc. If that sounds too technical, then you can go to Control Panel and check for Device Manager.
If your Windows PC is not able to recognize your pen drive or any other USB Device, then you can find Unknown Device on the list of different devices on the Device Manager panel. Right-click on Unknown Device, click on Properties and then go to Driver tab. You will find an Update Driver button on the screen now. Click the button and wait for the driver to update.
You can also get a step ahead and try to download the driver for your devices directly from the manufacturer’s website. Well, if the USB device is a flash drive or a pen drive, then you don’t have to follow this step as it may not be a driver issue. However, for installing a USB printer, or any other USB device, you may have to download and install the necessary drivers for the particular device.
Troubleshooting 3 – Disconnect USB Device & Restart Your PC
If your Windows PC is still giving USB Device Not Recognized error, then you can try out this method. Disconnect any USB Device from your Windows machine, either desktop or laptop and restart your PC.
Once the machine is restarted, try to connect the troubling USB device again and check whether it is working now. Also, modern day PC is equipped with multiple USB ports. So, if one USB port does not recognize the device, try with other ports. There are chances that it is a particular USB port, which is causing the error. If none of the USB port is able to recognize the device, then there’s some other issue altogether.
Troubleshooting 4 – Power On/Off USB Ports
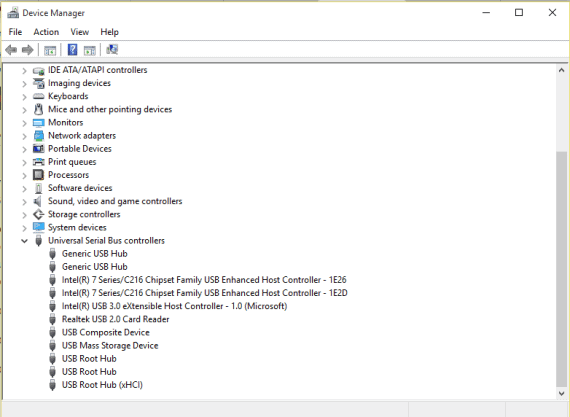
Next, best option is to switch on and off the power to your USB ports. You can do this easily from the Device Manager panel. Open the Device Manager window, find the Universal Serial Bus Controllers, and expand the section. Now, you will find either one or a list of different USB Root Hubs, Chipsets and other controllers under that section.
* Remember, you need to repeat the process for each USB Root Hub on the list.
Right click on a USB Root Hub and click Properties.
Under the Properties window, you can find the Power Management tab. Go to the tab and uncheck Allow the computer to turn off this device to save power.
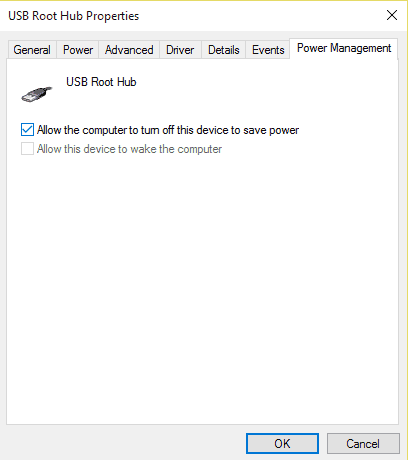
Click OK and restart your PC. Once restarted, try connecting the USB device and check if it works. If it doesn’t, then repeat the process for each USB Root Hub again and this time, check the box that was unchecked before. Restart the device again and try connecting the USB device. Leave the box unchecked or checked on the basis of whether it works or not in either way.
Troubleshooting 5 – Always Try Connecting Directly to Your PC
Well, if you are getting the USB Device Not Recognized error when you are connecting the device using a USB hub or a similar gadget like that, then you must know that the problem could be the USB hub itself and not your USB device.
At such times, always try and connect the USB device directly to your PC and check if it works.
Troubleshooting 6 – Try Windows USB Troubleshooter
Well, if none of the above troubleshooting methods works, then you can always try the Windows USB Troubleshooter on your Windows PC. It's a free tool available online on the official Microsoft website but it works well only on past Windows versions such as Windows XP, Vista and 7.
Simply follow the instructions on the website and let the troubleshooter tool fix the problems automatically as doing it yourself can be too technical and confusing. The tool is designed to troubleshoot the USB problems in every possible way and it is quite effective to get rid of USB Device Not Recognized errors.
Over to You
That’s it. Try out these troubleshooting methods to fix USB Not Recognized issue. Well, if the issue remains unsolved, then there are chances that the problem is with the device itself. Replace or change the device once and try again.
However, if it's the USB port that’s creating the USB Device Not Recognized issue, then it is advisable to get the help of a hardware expert and get it resolved.
Sources:- geekdashboard
Hey My Readers and Visitirs If You Like Us or Our Web Site Please Share and Link back To My Site ... Take Care .,.,.


.png)